Hallway Bathroom Update: Major Upgrade Without Demo
This month, I continue to showcase the transformation I led of a dated ‘70s-built but ‘90s renovated home for a lovely family. The family room reveal was first, followed by the primary bath; now I unveil the new and improved hallway bathroom.
When we sat down to discuss the renovation process with their budget in mind, this is one of the spaces that was a lower priority. While they still wanted an updated look, they preferred that their resources be directed more toward other areas of the house. Challenge accepted!

Where We Started
The layout of this bathroom did not lend itself to a major transformation—it had to stay the same—and that played into my cost-effective planning. We opted not to change the bathtub/shower area due to cost but we made some really exciting choices with respect to the vanity, lighting and flooring as well as what we did to upgrade and beautify the “puke yellow” wall.
Before

What We Did
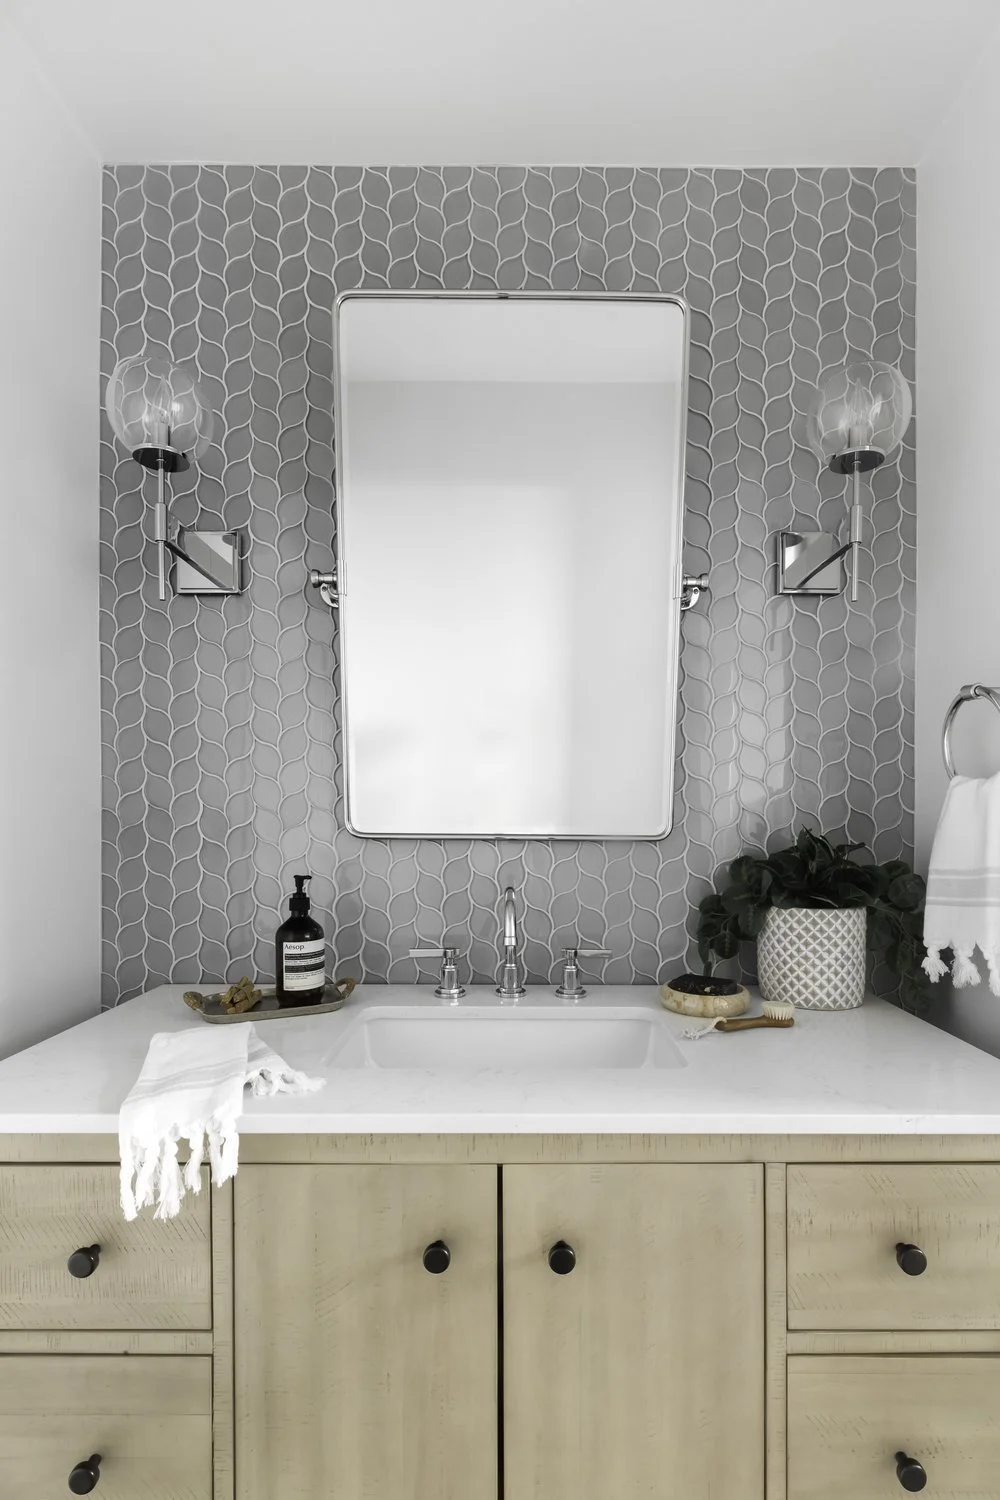
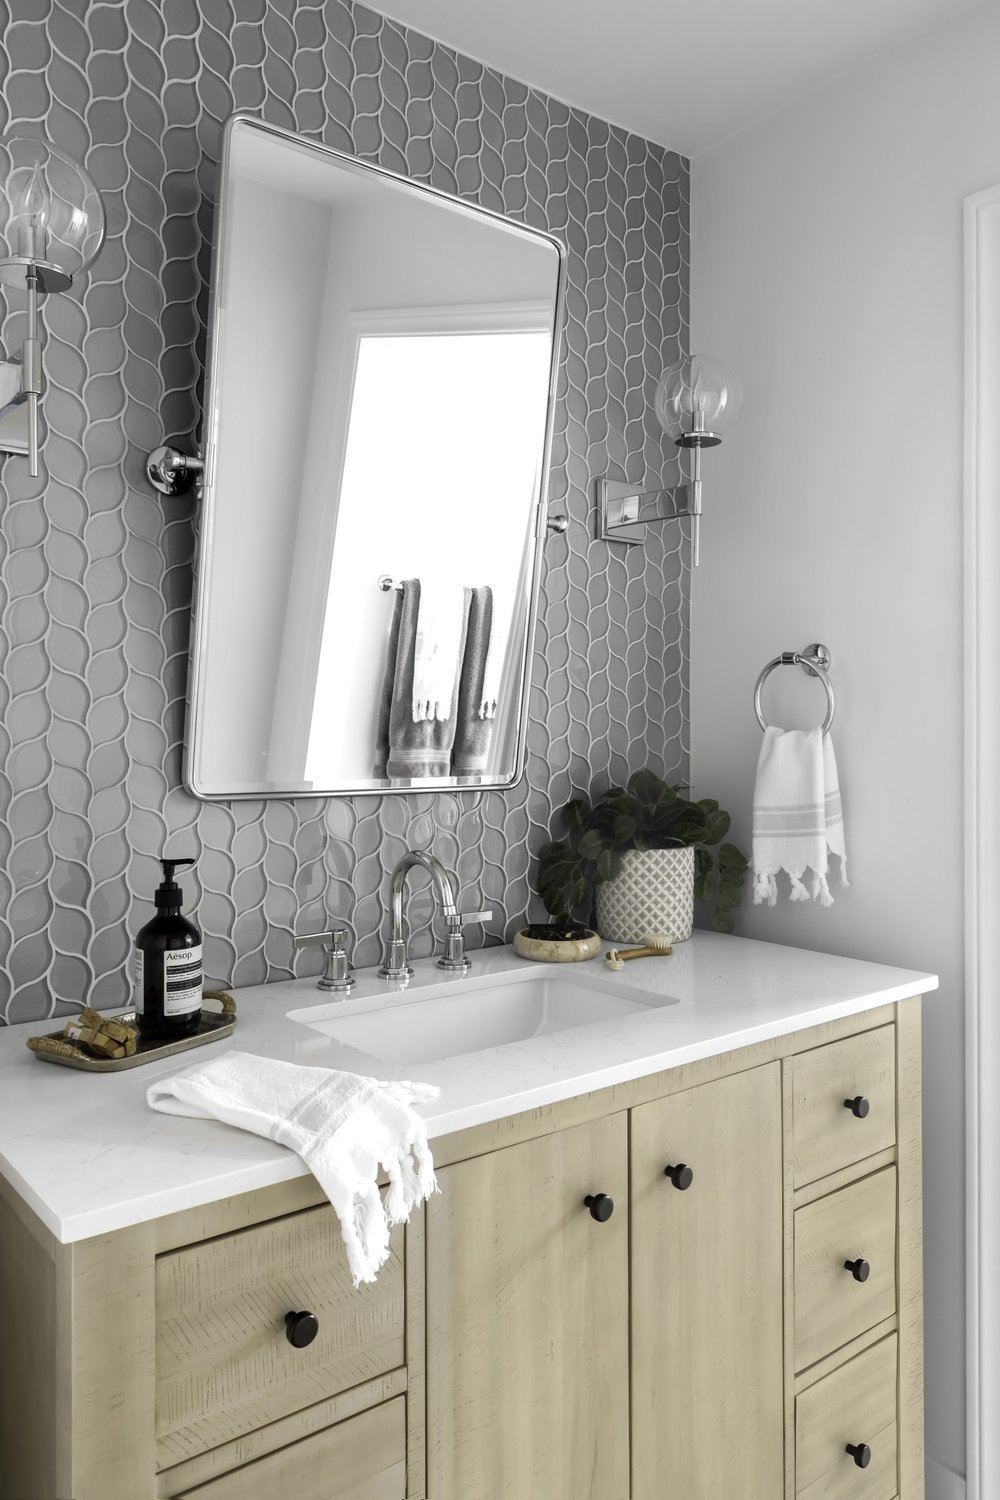
We started from the ground up by removing the existing tile floor and replacing it throughout the room with a beautiful neutral hexagon tile. We used a coordinating tile to replace the strip that wrapped around the walls of the tub to add a modern touch to the tub/shower area.
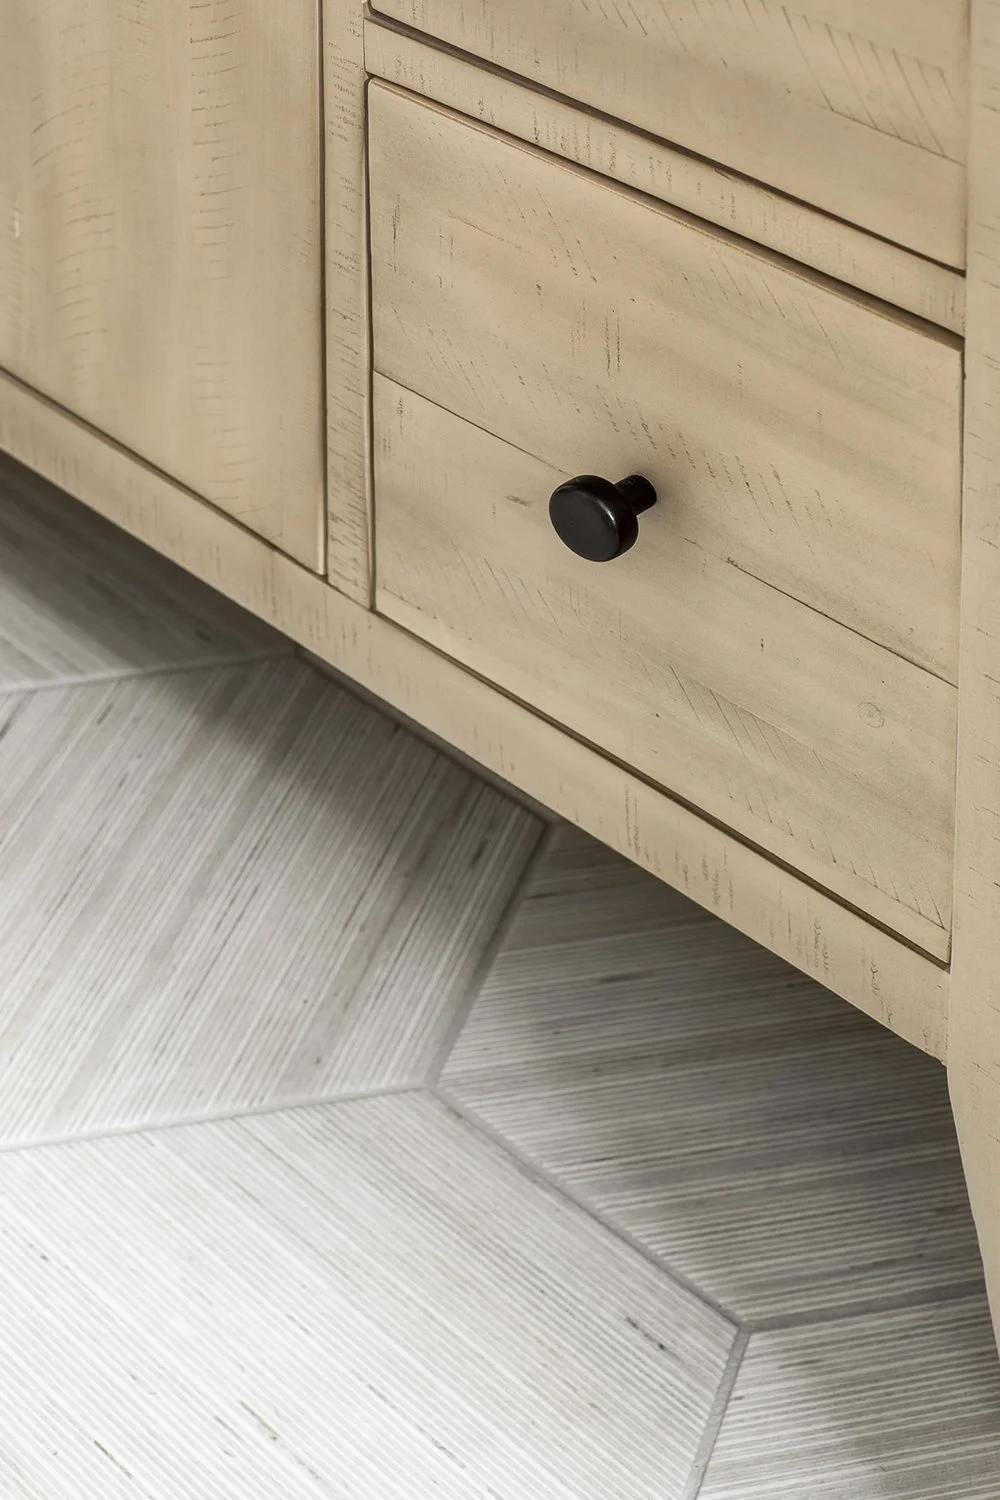
The existing vanity was removed and replaced with a freestanding vanity that has loads of storage space in drawers and the cabinet under the sink. Our choice has a white oak finish and white quartz countertop—design elements that gave the dated bathroom a more modern feel while keeping things classic and timeless.
The wow factor for me was the glass tile we chose for the wall behind the vanity; it adds texture and interest to the space while also acting as a backsplash. We chose a simple square mirror and two glass and chrome globe light fixtures to finish off the updated look and feel of the glass tile wall with an emphasis on clean lines.

The End Result
Without knocking down any walls or doing any demo whatsoever, this previously drab and outdated space got a spectacular facelift. Making smart design choices for the flooring, lighting, wall covering and vanity resulted in a bathroom with a lot more pizzazz. I’m so glad I could give this family a lot of “bang for their buck” in a space that their boys and their guests can enjoy.
Next month, I’ll be sharing how we transformed the living and dining room in this now beautiful home!
If you have a project in mind or don’t know where to start, please reach out to me. I would love to help!
Cheers!
Julie